Overview
Starting Mindmaps for Jira - Cloud
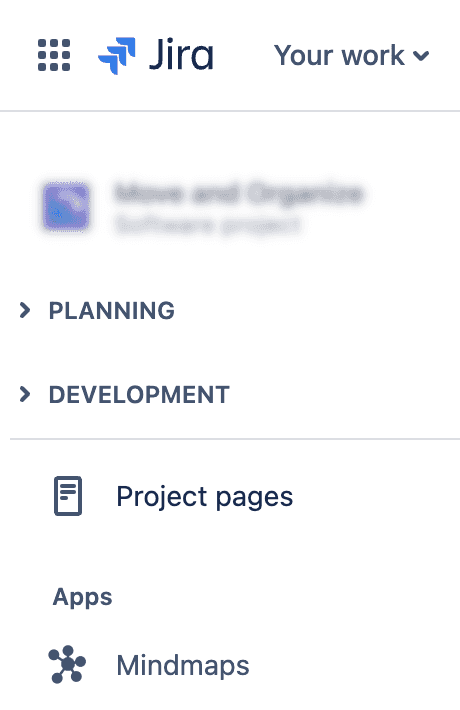
You start Mindmaps for Jira by navigating to the project in Jira you want to work on. Once installed successfully, Mindmaps for Jira is found as one of the menu options in the left-hand Project sidebar.
There is also a first time setup guide available via the Top menu → Apps → Mindmaps option. The guide will automatically help you identify if your Atlassian cloud instance require setup (see next section on Setup), and allow you to create a new mind map project or directly start Mindmaps for Jira for a project you select.
Starting Mindmaps for Jira - Data Center
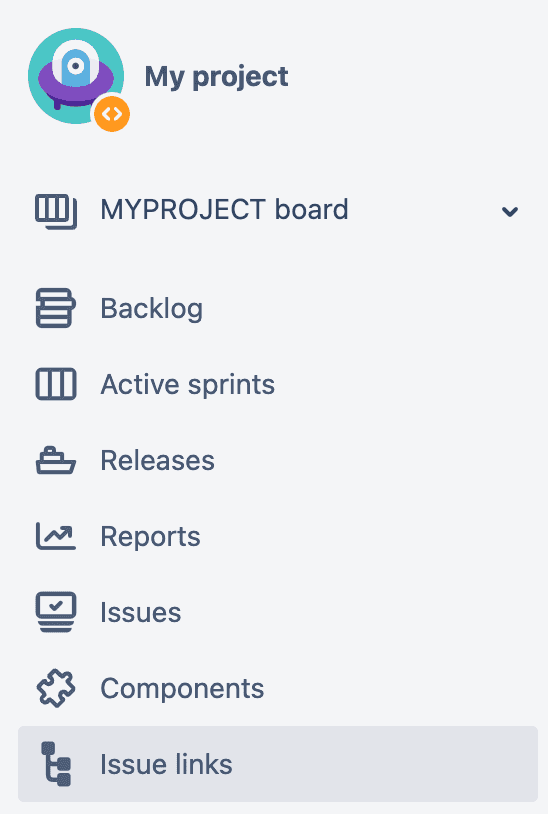
You start Mindmaps for Jira by navigating to the project in Jira you want to work on. Once installed successfully, Issue links is found as one of the menu options in the left-hand Project sidebar.
Setup - Cloud
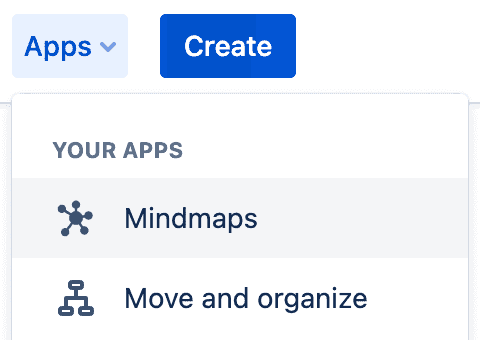
You start the Mindmaps for Jira setup guide directly via the Top menu → Apps → Mindmaps option.
This guide will inform you if any setup is required for your Atlassian cloud instance. You may also create a new mind map project or directly start Mindmaps for Jira for a project you select.
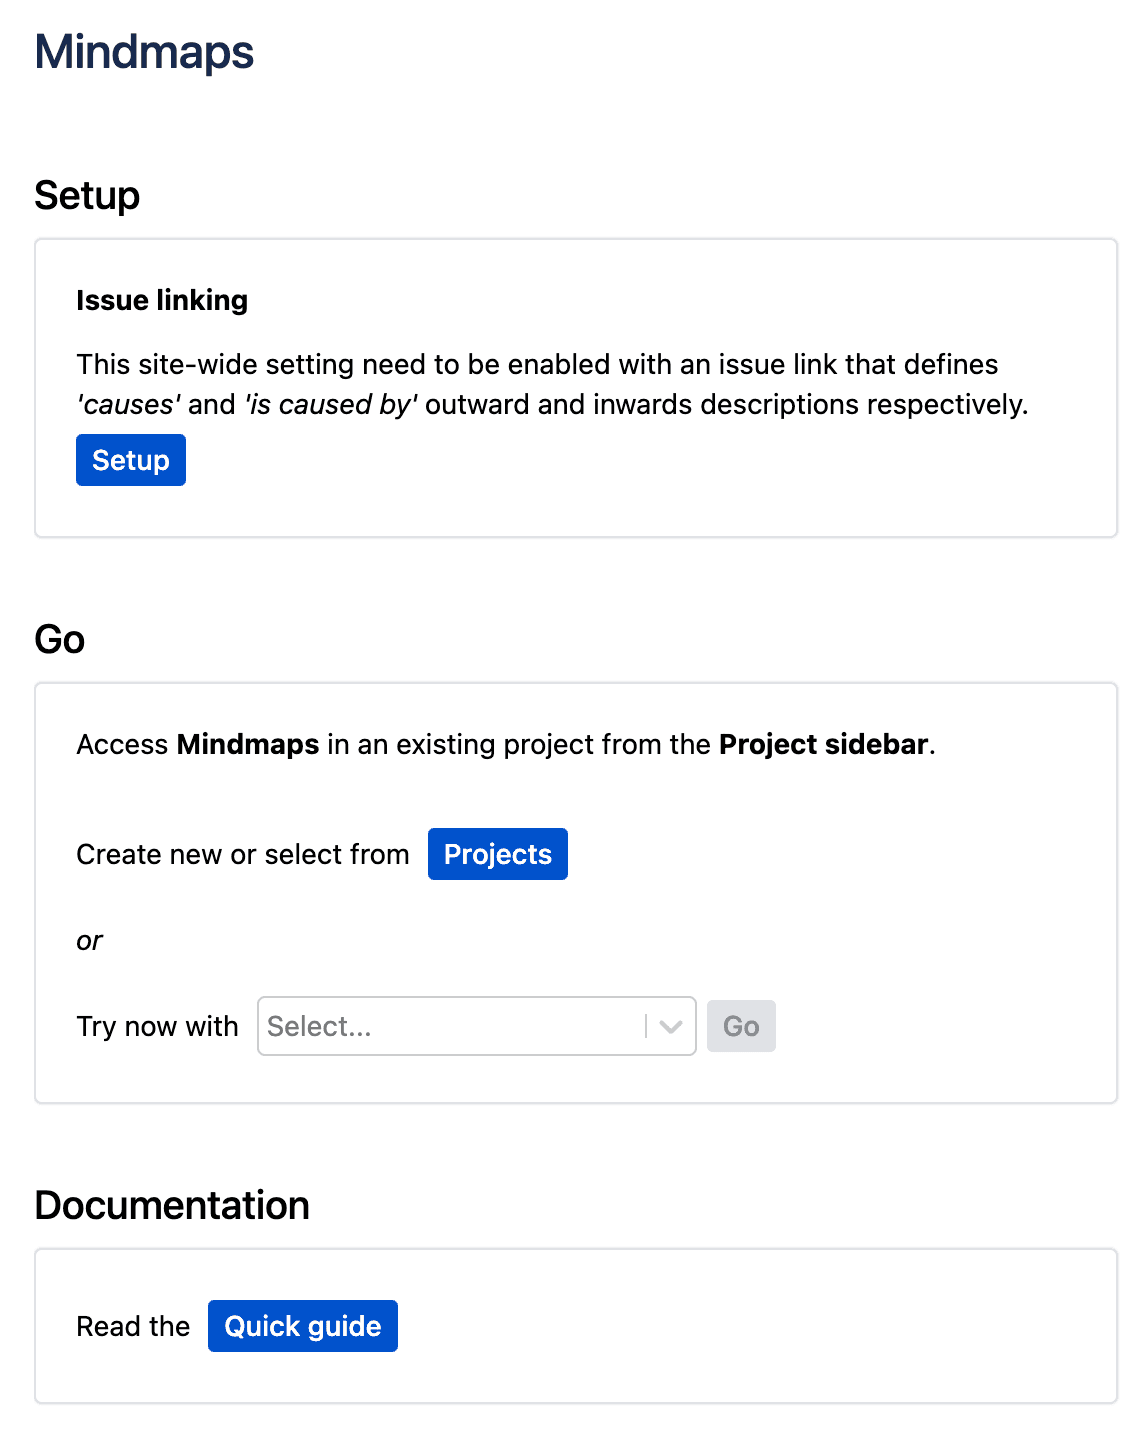
Issue Linking Setup
Jira's Issue linking feature is required for Mindmaps for Jira to operate. Enable issue linking via the Top menu → Settings → Issues → Issue linking screen. Ensure that at least one issue link exist that has different outward and inwards descriptions.
Tips and tricks - Mindmaps for Jira is a native integration and fully backwards-compatible with Atlassian Jira - any changes made by Mindmaps for Jira is also recognized by the Atlassian cloud instance.
Setup - Data Center
Issue Linking Setup
Jira's Issue linking feature is required for Mindmaps for Jira to operate. Enable issue linking via the Top menu → Administration → Issues → Issue linking screen. Ensure that at least one issue link exist that has different outward and inwards descriptions.
Issue Color Setup (Optional)
If you want to enable color support, Mindmaps for Jira require a custom field Issue color to be defined. Create a custom field with the name Issue color of the type Text Field (single line) via the Top menu → Administration → Issues → Custom fields screen.
After creating the new custom field, associate the field with all the available screens (or at a minimum the screens related to the project(s) you want to enable color support for).
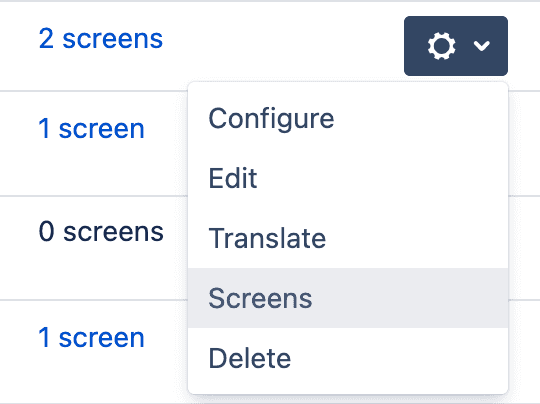
If you already have a field Issue color created and want to modify the screens, click the Actions dropdown in the custom fields list, and select Screens to access the screen configuration screen again.
Tips and tricks - Mindmaps for Jira is a native integration and fully backwards-compatible with Atlassian Jira - any changes made by Mindmaps for Jira is also recognized by the Atlassian data center instance.
Workspace

Mindmaps for Jira consist of these key components:
- Toolbar - The toolbar shows the current status of any task requests operating in the background, as well as all the configuration and action buttons
- Workspace - This is the main working area and displays your mind map. It is zoomable and scrollable using your mouse, touchpad and useful keyboard shortcuts
- Idea nodes - Inside the workspace, existing ideas in the project are shown as nodes in the tree
- Create nodes - Inside the workspace, at root level a create node is available to allow for a new mindmap root to be created. New sub-level ideas can also be added from existing ideas
Idea Node

Idea nodes provide details about the idea, as well as color styling (for company-managed projects).

Hover over the idea to show the action buttons based on your project permissions.
Idea nodes consist of these key components:
- Drag handle - The far left area of the node can be used to click and drag the node to move it to a different location in the hierarchy
- Issue link - Link to the detailed issue page
- Description - The main part of the node contain the idea description. Clicking on the description will allow you to modify it
- Remove button - Clicking the Remove button will remove the idea (and recursively all its linked children, if any)
- Expand/Collapse button - Clicking the Expand/Collapse button will show/hide all its children
- Add button - Clicking the Add button will show a create node to add a new idea with this idea as a parent
Permissions - Depending on your project permissions, not all of the fields and actions above are editable or actionable. For instance, if you do not have Edit permissions, the issue description and field will be read-only. If you do not have Delete permissions the Remove button will not be shown.
Create Node

A new idea may be created by clicking the Add action button on an existing idea. If you click it, it will enable editing mode where you can input the description for the new idea you are creating.

A create node is also shown at root level where a new main idea can be created.
Tips and tricks - Use the Enter key to create the new idea directly using the keyboard. Multiple ideas can be entered in sequence while repeatly typing in the new descriptions and using the Enter key. Mindmaps for Jira will automatically scroll the workspace viewport to keep the create node in view and focus to allow you to keep editing with speed.
Toolbar and Status
Status Indicator
The status indicator show you the number of active background tasks (these are actions Mindmaps for Jira are performing for you, communicating with your Atlassian cloud instance).

Idle mode

Busy mode

Critical mode
Note - Never close Mindmaps for Jira while in Critical mode. Wait for any critical tasks to complete and the status indicator moves to Idle or Busy mode first, to safely exit the page.
Link Type Configuration
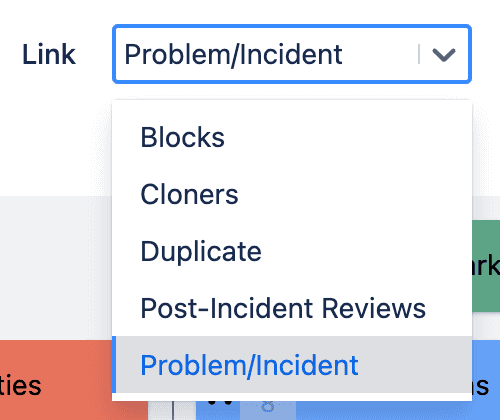
The link type dropdown allows you to select which link type to use for the Jira related issues hierarchy. If you change it, the workspace will be refreshed and an updated hierarchy will be displayed based on the new selection.
Action Buttons

The following generic actions are available:
- Choose color - Opens the color selector to change the color of currently selected ideas and/or set the current color for new ideas created.
On the Data Center version and the Issue color setup is not complete, a warning symbol will appear with instructions on what additional configuration is required - Print - Opens the print view dialog to print or export the complete mind map in a suitable display format
Support Buttons


The following support actions are available:
- Give feedback - If you encounter any bugs or issues with Mindmaps for Jira, or would like to suggest a new feature or capability that you think would be useful, this section provides direct e-mail access to us so that we can assist you
- Recommend - Links to recommend Mindmaps for Jira through various services (we hope you like it!)
- Help - Link to the Mindmaps for Jira quick guide (this document)
Navigation and Handling
Keyboard Operation
Overview

There are a number of keyboard shortcuts setup to help you make use of Mindmaps for Jira with efficiency:
- Letter keys - A cluster of keys easily accessible by the left hand is intended as the primary means for navigating within the full workspace
- Navigation keys - Additional keys for navigating within the full workspace
- Arrow keys - Used for navigating within the local area
- Control keys - Used for selecting/deselecting ideas and other special functions
Selecting Ideas
Select or deselect an idea
This key works in combination with the mouse, press and hold the Ctrl (or ⌘ on macOS) key while clicking the mouse on an idea to add or remove it from the current selection
Select a range of ideas
This key works in combination with the mouse, press and hold the Shift key while clicking the mouse on an idea to select a new range
Note - Selecting multiple ideas within a range work within the same hierarchy level and when all the ideas have the same parent idea
Scrolling
Scroll one page up
Scroll one page down
Scroll one page left
Scroll one page right
Scroll one idea up
Scroll one idea down
Scroll one idea left
Scroll one idea right
Scroll to the far left
Scroll to the far right
Scroll to center on mind map root
Mouse and Touchpad Operation
Mindmaps for Jira make use of click and scroll events to enable you to work with ease with your Jira project.
Mouse and Touchpad devices are both supported - this includes supports for Mouse scroll wheels and swiping left/right and up/down to perform scrolling within the workspace area (finger gestures may based on your system setup, so it will not be described here).
Dragging and Scrolling
When you start to drag a selection, you will find that the border around the workspace changes. A wide, dark grey gradient pops up along the four edges of the workspace. This is the Scroll Border - it allows you to automatically keep scrolling in the direction you desire while dragging. You start this scrolling by moving the mouse cursor within the border area.
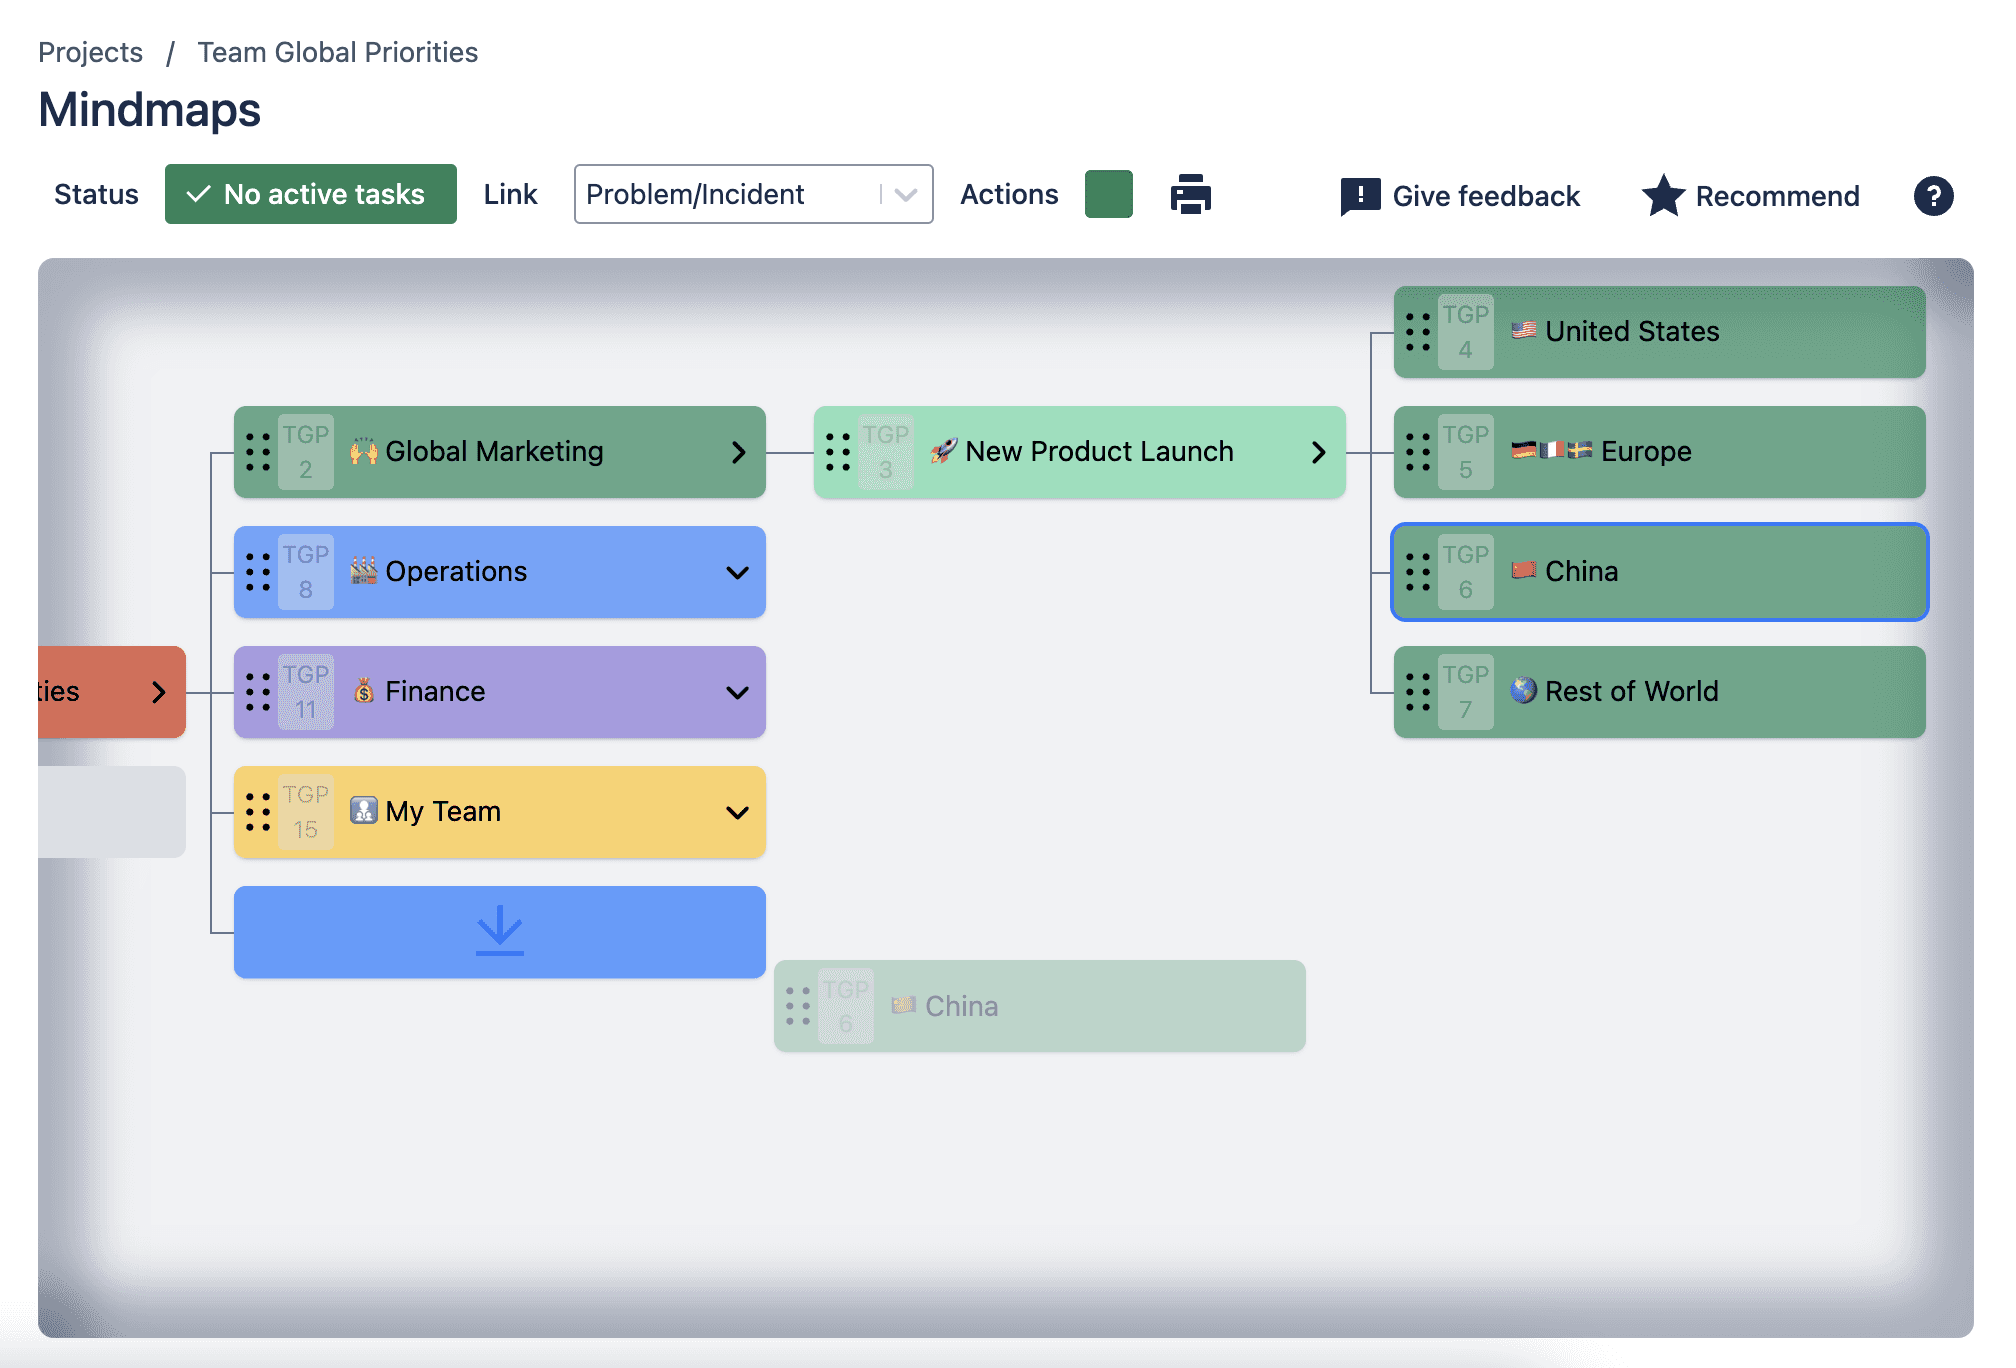
The scroll border features a dark grey gradient to help visually indicate the speed of scrolling that will take place depending on where your place your mouse cursor.
Tips and tricks - Keyboard shortcuts may still be used in combination with the scroll border for even faster/more precise scrolling and orientation.
Expanding/Collapsing Ideas

Clicking the Expand/Collapse button (located at the right centre of ideas) will expand or collapse the tree accordingly. Any child nodes that have not yet been loaded from the Atlassian cloud instance will be automatically loaded in the background.
Actions and Operations
Creating Ideas

After clicking the Add button within an idea or the Create node at root level, Editing mode allows you to directly enter the description of the new idea you are creating.
Adding symbols and emojis - Click the right-hand Emoji button to insert symbols from the icon collection to further express and style your ideas.
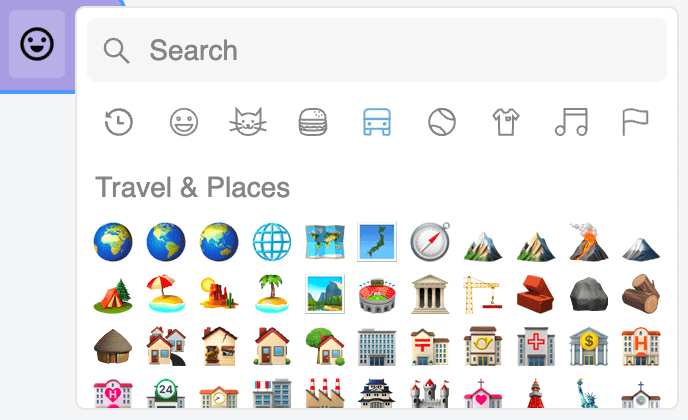
Use the Enter key or click the Check button to create the new idea. Click the Cross button to abort.
Selecting Ideas
Multiple ideas may be selected in order to change the color, including ideas at different hierarchy levels.

In order to select multiple ideas, you will need to use keyboard shortcuts:
- Add/Remove single item - Use the Ctrl/⌘ key to add/remove the idea to your current selection
- Add range of items - Use the Shift key to add all the ideas between this idea and your last selected idea. Note - This is only applicable if all the Ideas have the same parent idea
Reset selection - Clicking anywhere in empty workspace area will reset your selection. Clicking on to select a new idea without using any of the keyboard shortcuts will remove any previous ideas from your selection.
Moving Ideas
You can move both single ideas and a selection of multiple ideas.
A pending Move operation starts when you drag your selected idea using the drag handle, and drop it onto the desired new parent idea. Depending on rules, such as if the dropped idea is a parent of the idea you are trying to make it a child of, the Move may or may not be possible to execute in the Atlassian cloud instance.
Landing pad highlighting tells you if the move to the new location is possible:

Full - The selected ideas(s) can be moved to the new location

Partial - Some of the selected ideas(s) can be moved but not all. Those that can be moved will still be moved if you drop your selection here, but the others will remain at their original location

Not allowed - The selected ideas(s) cannot be moved. This occurs when the idea is a parent further up in the hiearchy for the idea you are trying to drop it on

Unapplicable - The selected ideas(s) cannot be moved as the drop target location is unapplicable. This occurs when you try to move an idea to itself or its current parent

Loading - Mindmaps is loading additional information from the Atlassian cloud instance in order to determine if the move is possible. A moving spinner icon will appear until completed
Note - Critical mode. When moving multiple issues, Mindmaps enters critical mode (this is highlighted by the status indicator changing to red background). Do not close Mindmaps until the operation has finished.
Editing Ideas

Clicking on the description of the idea will allow you to modify it.
Adding symbols and emojis - Click the right-hand Emoji button to insert symbols from the icon collection to further express and style your ideas.

Use the Enter key or click the Check button to confirm the new description. Click the Cross button to abort.
Removing Ideas

Click on the upper right Cross button to remove an idea.
If the idea has children, a dialog box will popup to confirm that all child ideas under this idea will be removed recursively.

Tasks with Sub-tasks - If you are removing a Jira Task that contain Sub-tasks, the Sub-tasks will be removed together with the Task.
Choose Color
Multiple ideas may be selected in order to change the color, refer to the Selecting Ideas section above for more information.

Choose color - Click the Choose Color action from the Toolbar. It opens the color selector that allow you to change the color of currently selected ideas and/or set the current color for new ideas created.

Note - Color selection is supported for company-managed projects, but not in team-managed projects.
The Print action button in the Toolbar will open up a new print view dialog. This dialog will load the entire mind map tree in a fully expanded, read-only mode in a format suitable for printing.
Once loaded, the browser's native print dialog will be invoked. Depending on your system capabilities, from here you can now configure, print or export to PDF (or other formats supported) the mind map for distribution.

Note - The print settings and capabilities is dependent on the system environment you are running on, as it invokes the browser native print dialog. Setup options available will be based on your system capabilities.
Note - Some systems do not enable the printing of background color and information by default. You may need to enable this option in your system print settings for the colors and/or tree structure to show in your final print output.
Compatibility and Others
Browser Compatibility
The software has been officially tested on the following browser versions:
- Chrome: >= 100
- Edge: >= 84
- Firefox: >= 95
- Safari: >= 15.4
Tips and Tricks
- Mouse wheel horizontal scrolling
Depending on your Operating System and browser combination, a keyboard shortcut may be available to perform horizontal scrolling using the scrollwheel (ie by pressing the Shift key), which can be very useful in Mindmaps for Jira
- Touchpad swiping exits Mindmaps for Jira and navigates to another page?
The Back/Next swipe feature is a standard behaviour on some Operating System and browser combinations. While we do not want to override standardized system behavior, if this is an inconvenience to you it is normally possible to disable this (ie on MacOS this is disabled in System Preferences → Trackpad → More Gestures)
- Keyboard scroll shortcuts not taking effect?
While focus is on a textbox (ie while creating a new issue or editing the description of an existing issue) keyboard shortcuts for scrolling is not available (as they are needed for text input)
- Printing or PDF export missing colors and/or tree structure information?
Some systems do not enable the printing of background color and information by default. You may need to enable this option in your system print settings for the colors and/or tree structure to show in your final print output
Known Limitations
- Jira cloud color support
Company-managed projects has native support for issue colors. Team-managed projects do not support this feature.